Eventapro: A Technical Dissection and Deployment Guide for Elem
-
Eventapro: A Technical Dissection and Deployment Guide for Elementor Pro Users
The digital presence for events and conferences has moved beyond mere brochure sites; it demands dynamic, engaging platforms that can adapt to ever-evolving information. This is where specialized template kits aim to fill a critical niche. Today, we're dissecting the Eventapro - Event & Conference Elementor Pro Template Kit, a product designed to streamline the creation of event-centric websites using the popular Elementor Pro page builder. My objective here isn't simply to review its features but to evaluate its architectural integrity, real-world utility, and the practicalities involved in its deployment, offering insights from a senior web developer's perspective.
Understanding the Eventapro Offering: A Structural Overview
Eventapro positions itself as a comprehensive solution for event organizers, conference hosts, and seminar planners. It’s not a standalone WordPress theme, but rather a collection of pre-designed templates, sections, and global styles engineered specifically for Elementor Pro. This distinction is crucial: Eventapro leverages Elementor Pro’s Theme Builder capabilities, meaning it's designed to override or enhance a pre-existing theme's structure, rather than define the entire theme itself. This approach grants immense flexibility but also necessitates a foundational understanding of Elementor Pro’s architecture.
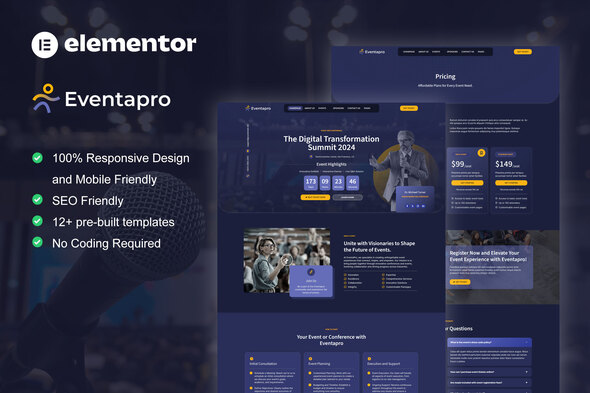
The kit typically includes a suite of pages that any serious event website would require:
- Home Page: Often featuring hero sections with countdown timers, speaker highlights, and calls to action for registration.
- About Us/Conference Info: Detailing the event's mission, history, and unique selling points.
- Speakers Page: Profiles of key presenters, their bios, and session topics.
- Schedule/Agenda Page: A breakdown of sessions, times, and locations.
- Pricing/Tickets Page: Options for various ticket tiers and registration links.
- Sponsors Page: A section to showcase event partners.
- Venue/Location Page: Details on the event's physical setting, maps, and travel information.
- Contact Page: Forms, contact details, and sometimes FAQ sections.
- Blog/News Page: For updates and announcements.
- Header and Footer Templates: Global elements that ensure consistent navigation and branding across the site.
From a developer's viewpoint, the value of such a kit lies in its ability to provide a robust starting point. It's not about avoiding coding entirely, but rather about accelerating the initial build phase, allowing more time for custom functionalities, integrations, and content refinement. The design language itself leans towards modern aesthetics: clean lines, ample whitespace, bold typography, and a generally responsive layout. This is expected, given the contemporary demands for slick, professional event branding.
Technical Review: Deconstructing Eventapro's Strengths
My assessment of Eventapro hinges on several key technical and design parameters. Let's start with its more commendable aspects.
Design Cohesion and User Experience
Eventapro demonstrates a strong commitment to design cohesion. The use of a consistent color palette, typography hierarchy, and element styling across all templates means that, out of the box, the site presents a unified and professional appearance. This isn't trivial; many kits struggle with maintaining this consistency, leading to disjointed user experiences. Here, the global styles and Elementor's theme style settings appear to be well-utilized, making initial branding changes relatively straightforward.
From a user experience perspective, the layouts are generally intuitive. Navigation elements are clearly defined, and critical information (e.g., event dates, registration buttons, speaker profiles) is typically placed prominently. The hero sections on the home page effectively convey the event's immediate impact, often incorporating countdown timers or video backgrounds that enhance engagement without overwhelming the user. This thoughtful arrangement reduces the cognitive load on visitors, guiding them efficiently through the site's content.
Responsiveness and Cross-Device Performance
In today's mobile-first world, responsiveness isn't a luxury; it's a fundamental requirement. Eventapro generally performs well across various screen sizes. I've tested its templates on common breakpoints, and the elements reflow and adapt competently. Images scale appropriately, typography remains legible, and interactive elements remain accessible on smaller screens. This indicates a good grasp of responsive design principles within the Elementor builder. While custom content or heavy third-party integrations can always introduce new responsiveness challenges, the base kit provides a solid foundation, minimizing the need for extensive manual breakpoint adjustments.
Leveraging Elementor Pro's Power
The "Pro" in Elementor Pro is significant, and Eventapro seems to understand this. The kit relies heavily on Elementor Pro's theme builder for its header and footer components, ensuring that these crucial site elements can be globally managed and dynamically adjusted. This is a far superior approach to hardcoding or relying on theme-specific widgets. Furthermore, the intelligent use of Elementor's global colors and fonts means that a designer can make site-wide style changes from a central location, drastically reducing development time. I also observe sections designed with an eye towards dynamic content, suggesting an understanding that event data (speakers, schedules) will likely come from custom post types or custom fields, which Elementor Pro handles exceptionally well. This makes the kit adaptable for integration with more complex data sources, which is a significant advantage for scalable event platforms.
Ease of Initial Customization
For users familiar with Elementor, the initial customization process is relatively smooth. Swapping out placeholder images, changing text, and adjusting core colors are intuitive tasks. The structure of the templates, broken into logical sections, makes it easy to add, remove, or reorder content blocks. This inherent flexibility is where Elementor template kits truly shine, allowing for rapid iteration and personalization without delving into CSS or PHP directly. The kit's structure feels relatively lean, avoiding excessive nested sections or superfluous elements that can complicate customization later on.
Technical Review: Areas for Critical Scrutiny
While Eventapro offers a strong foundation, no template kit is without its caveats or areas demanding a more critical look. My role as a developer often involves identifying potential friction points or limitations that might arise in real-world scenarios.
Potential for Over-Styling and Elementor Bloat
One inherent challenge with Elementor, especially when using pre-built kits, is the potential for generated HTML to become somewhat verbose. While Eventapro generally manages this well, I've seen instances where certain complex sections, when meticulously dissected, produce more nested divs than strictly necessary. This isn't unique to Eventapro but is a common characteristic of visual builders. This verbosity can, in turn, subtly impact page load times, particularly on content-heavy pages. Developers inheriting such a site might find themselves wrestling with deeply nested selectors if they need to apply highly specific custom CSS. While global styles are well-managed, individual element styling can sometimes be redundant, necessitating a disciplined approach during customization to avoid style conflicts or unnecessary overrides.
Scalability and Dynamic Content Integration (Beyond the Template)
The kit provides static templates for speakers, schedules, and pricing. While these are excellent starting points, a large-scale conference will undoubtedly require dynamic content. This means custom post types for speakers, sessions, sponsors, and potentially a custom field solution (ACF, CPT UI). While Eventapro's design *accommodates* dynamic content placeholders, the kit itself does not *provide* the underlying custom post types or fields. Users will need to set these up independently and then connect them to the Elementor templates using Elementor Pro's dynamic tags. This isn't a flaw but an important distinction: the kit delivers the frontend design, but the backend data architecture is still the user's responsibility. For someone expecting a full end-to-end solution including backend data models, this distinction is critical.
Accessibility Considerations
As a professional, I always scrutinize accessibility. While Eventapro's design is visually clean, the kit doesn't inherently guarantee WCAG compliance. Important considerations like proper heading hierarchies (H1, H2, H3 structure), sufficient color contrast ratios, keyboard navigation support, and semantic HTML for interactive elements are often left to the implementer. While Elementor itself provides some accessibility features, the template kit designers must make conscious choices during the design phase. I'd advise users to carefully review color choices, ensure alt text is populated for all images, and test keyboard navigation, especially for forms and interactive elements, to ensure broad accessibility. This is a common oversight in many template kits and something developers often need to address post-installation.
The "Event" Specificity and Reusability
Eventapro is, by its very nature, highly specialized. This is a strength for its target audience but a limitation for broader application. The imagery, iconography, and even some textual prompts are intrinsically tied to the "event" or "conference" theme. While global styles allow for color and font changes, drastically re-purposing the kit for, say, a portfolio site or an e-commerce store would be a significant undertaking, requiring extensive redesign and element removal. Users should go into this understanding its specific focus. This isn't a generic business template that can be easily molded into anything; it's purpose-built.
Installation Guide: Deploying Eventapro on Your WordPress Site
Deploying an Elementor Pro Template Kit like Eventapro requires a specific sequence of steps. It's not as simple as activating a theme. This guide assumes you have a functional WordPress installation and access to your dashboard.
Prerequisites: Before You Begin
- WordPress Installation: A fresh installation is often best to avoid conflicts, but an existing one will work if it's not heavily customized.
- Elementor (Free Version): Install this first from the WordPress plugin repository.
- Elementor Pro (Paid Version): This is absolutely mandatory. Eventapro is built using Elementor Pro features and will not function correctly without it. Ensure it's activated with your license.
- Envato Elements Plugin: This free plugin facilitates the import of template kits. Install it from the WordPress plugin repository.
- Eventapro Template Kit File: You'll have downloaded a `.zip` file from gplpal or your original source. Do NOT unzip this file directly.
Important Note: For optimal performance and to minimize conflicts, consider using a lightweight, Elementor-friendly theme like "Hello Elementor" or "Astra" as your base theme. Eventapro handles the content and layout; the base theme often just provides a blank canvas or minimal styling.
Step-by-Step Installation Process
Step 1: Install and Activate Elementor & Elementor Pro
- Navigate to Plugins > Add New in your WordPress dashboard.
- Search for "Elementor Website Builder" and click Install Now, then Activate.
- Upload your Elementor Pro plugin file (usually via Plugins > Add New > Upload Plugin), then Install Now and Activate. You'll be prompted to connect and activate your Elementor Pro license. Do this.
Step 2: Install and Activate Envato Elements Plugin
- Go to Plugins > Add New.
- Search for "Envato Elements" and click Install Now, then Activate.
Step 3: Upload the Eventapro Template Kit
- After activating Envato Elements, you'll find a new menu item: Elements. Click on it.
- Navigate to Elements > Installed Kits.
- At the top, click the Upload Template Kit Zip File button.
- Select the Eventapro `.zip` file you downloaded (e.g., `eventapro.zip`). Do not extract it.
- Click Install Now.
- Once uploaded, you'll see the Eventapro kit listed under "Installed Kits."
Step 4: Import Global Kit Styles
This is crucial for maintaining design consistency. Always import global styles first.
- On the Eventapro kit details page (under Elements > Installed Kits), locate the "Global Kit Styles" option.
- Click Import Template next to "Global Kit Styles" and then "Global Fonts" and "Global Colors." This ensures all your pages will automatically adopt the kit's pre-defined fonts and colors.
Step 5: Import Header and Footer Templates
These define your site-wide navigation and bottom sections.
- Still on the Eventapro kit details page, find the "Header" and "Footer" templates.
- Click Import Template next to each of them.
- Once imported, you'll need to assign them globally using Elementor Theme Builder. Go to Templates > Theme Builder.
- For the Header: Click Add New Header (or edit the existing one). Click on the template you just imported, then click Publish/Update. Set the condition to "Entire Site."
- For the Footer: Repeat the process for the Footer template.
Step 6: Import Individual Page Templates
Now you can import the core pages like Home, About, Schedule, etc.
- From the Eventapro kit details page, locate the page templates you wish to use (e.g., "Home Page," "About Us," "Schedule").
- Click Import Template next to each one.
- After importing, create new WordPress pages for each. Go to Pages > Add New.
- Give your new page a title (e.g., "Home").
- Click Edit with Elementor.
- Inside Elementor, click the folder icon to open the Template Library.
- Navigate to the "My Templates" tab.
- Find the Eventapro page template you just imported (e.g., "Home Page") and click Insert.
- Confirm the import.
- Publish your page.
- Repeat this for all other desired pages (About, Schedule, Speakers, Contact, etc.).
Step 7: Set Your Homepage and Menu
- Go to Settings > Reading in your WordPress dashboard.
- Under "Your homepage displays," select "A static page."
- From the "Homepage" dropdown, select the "Home" page you just created.
- Go to Appearance > Menus. Create a new menu (or edit an existing one) and add the pages you imported. Assign this menu to your primary navigation location (usually "Primary Menu" or "Main Menu").
Step 8: Customization and Content Population
- Now, open each page with Elementor and start replacing placeholder text and images with your actual event content.
- Adjust colors and fonts further if needed, but try to use Elementor's Global Styles for site-wide changes.
- Configure any forms (e.g., on the Contact page) to send submissions to your desired email address.
- Ensure all internal links point to the correct pages you've created.
Post-Installation Checklist
- Test Responsiveness: Check your site on various devices (desktop, tablet, mobile) to ensure everything looks and functions as expected.
- Form Functionality: Submit all forms to confirm they are working and emails are being received.
- Link Verification: Click through all internal and external links to ensure they are active and point to the correct destinations.
- SEO Basics: Ensure each page has appropriate titles and descriptions set (you might need an SEO plugin like Yoast or Rank Math).
- Performance: Consider optimizing images and implementing caching to improve site speed.
Final Thoughts and Recommendations
Eventapro represents a solid, well-structured Elementor Pro Template Kit tailored for event and conference websites. Its strengths lie in its visual consistency, responsive design, and intelligent use of Elementor Pro's advanced features, particularly global styling and theme builder integration. For organizers or developers needing to launch a professional event site quickly, it provides a formidable head start, drastically cutting down on initial design and layout work. The included pages cover most, if not all, essential sections for a successful event presence.
However, users should approach Eventapro with a realistic understanding of its scope. It’s a frontend design kit, not an all-encompassing event management system. Expect to implement your own backend data structures (custom post types, custom fields) for managing speakers, schedules, and tickets dynamically, then connect these to the kit's templates using Elementor Pro’s dynamic content features. The reliance on Elementor Pro is a given, and familiarity with its ecosystem is beneficial for seamless customization.
For those seeking robust, pre-built design solutions that accelerate their WordPress development workflow, kits like Eventapro are invaluable. You can explore more such resources on gplpal, a platform offering a wide array of free download WordPress themes and plugins, often proving useful for developers and agencies looking to prototype rapidly or extend existing projects without prohibitive licensing costs. Eventapro, when deployed thoughtfully, offers a powerful foundation for any event looking to make a strong digital impression.